
E4 | Essex County Colonial | Making Connections
Season 48 Episode 4 | 23m 42sVideo has Closed Captions
Jenn sees local cherry trees; Richard reviews rough plumbing; Zack flashes low pitch roof.
Kevin O'Connor checks in as Zack Dettmore protects the wall-hung toilet tank with a steel plate. Richard Trethewey reviews rough plumbing through the house with Kordian Rak, finishing in the kitchen where cast iron pipe is being installed instead of PVC. Zack details types of flashing on a low pitched roof, Jenn Nawada tours Newark's famous cherry blossoms.
Problems playing video? | Closed Captioning Feedback
Problems playing video? | Closed Captioning Feedback
Funding for THIS OLD HOUSE is provided by The Home Depot and Renewal By Andersen.
Support provided by:


E4 | Essex County Colonial | Making Connections
Season 48 Episode 4 | 23m 42sVideo has Closed Captions
Kevin O'Connor checks in as Zack Dettmore protects the wall-hung toilet tank with a steel plate. Richard Trethewey reviews rough plumbing through the house with Kordian Rak, finishing in the kitchen where cast iron pipe is being installed instead of PVC. Zack details types of flashing on a low pitched roof, Jenn Nawada tours Newark's famous cherry blossoms.
Problems playing video? | Closed Captioning Feedback
Where to Watch This Old House
This Old House is available to stream on pbs.org and the PBS app.
Keep Exploring


This Old House Insider Newsletter
Get This Old House exclusive stories, tips, and behind-the-scenes information delivered right to your inbox every month.Providing Support for PBS.org
Learn Moreabout PBS online sponsorshipKevin: Today on "This Old House"... Richard: Rough plumbing is underway.
And the sign of good plumbing?
It isn't seen, and it isn't heard.
We'll show you how to make that happen.
[ Drill motor whirring ] Jenn: And I'm at a park with more cherry blossoms than the Tidal Basin in D.C., and we're just 4 miles from our project house.
♪ Man: Ah, that's it.
♪ ♪ ♪ Kevin: Hey, there.
I'm Kevin O'Connor, and welcome back to "This Old House" and to our project here in Essex County, New Jersey, where, as you can see, spring has sprung in this town, just over 10 miles west of New York City.
And we are working on this beauty right here, a late 19th-century Dutch colonial revival with its quintessential gambrel roof.
This one has got three dormers punching through it, with an asymmetrical front porch that gives us a deep overhang and a center entrance.
Let's have a look inside.
So, last time we were here, it was about framing that came after the demolition, and now it is about roughing of all of our mechanical systems.
Hey, Richard.
Richard: For sure, my favorite part of the project, obviously -- waste, water, wires.
Kevin: Obviously.
Richard: You know, all the important stuff.
Kevin: And you guys have started to dig in.
Richard: Right.
So, the challenge is, how to safely put all the new stuff into the building.
So, we opened up this wall, and we discovered the previous remodeler did some interesting -- This gets your attention -- cut out the structure here, but, fortunately, we're holding the building up fine right here.
Now, these holes also tell us something.
This is an outside wall.
They had blown-in insulation.
So now the plumbers need to get water up to this bathroom, which is out here.
So they ran two full-size PEX lines to the new bathroom upstairs, inside, because we realized that this was outside.
The entire bathroom sits over that front entry you just came in through.
Kevin: So that's flanking the porch right there.
Richard: Correct.
So, now we're gonna be nice and safe.
But they are well underway.
We got a lot to show you today.
Kevin: We'll be happy to check in on it.
So, let's just get a little lay of the land.
As you come through the front door, you've got a center staircase, and to the left of it is the original living room.
And then, as you push into the house, we've got the original -- Hey, Justin.
Justin: Hey, Kevin.
Kevin: We've got the original dining room.
And so, from here to the front of the house, things pretty much stay the same.
Just some new materials and some updating.
But then, as you come into the back of the house, this is where we see a lot of the changes.
So, this is the old kitchen and will become the new kitchen with a new layout and everything upgraded, although it will be within the existing footprint, the door to the back deck stays, but another door that you'll be able to enter from the driveway down below has been added so you can step into a proper mud room.
It used to be a powder room in there.
That space has been moved so that we have a powder room over in here.
And last week, when we were here, our plumber Kordian installed the wall-hung toilet, which explains the tank you see behind it.
Hey, Zack.
Zack: What's up, Kevin?
Kevin: Ah, not much.
Going well?
I see a lot of progress, which we like.
Zack: Yeah, we had a productive week.
Kevin: And now you're walking around with a sheet of steel?
Zack: When we're coming along, doing our trim carpentry, do you think we'll remember that tank is there?
Kevin: If you do, the next person won't.
So you've got some protection in mind?
Zack: Exactly, yeah.
$70 for this sheet of steel and just 24x24.
And I'm just going to screw it right there.
So, cheap insurance, in my book.
Kevin: A lot cheaper than if you pop that tank and you're gonna have someone repair it.
Okay.
I like the way you think.
All right.
I'll check in with you later.
Zack: See ya.
[ Drill motor whirring ] ♪ Richard: All right.
We're up here on the second floor in the new primary bath.
Here's that water supply we just saw downstairs that run up from the basement.
And now this is a shower.
There's a toilet right here and a lavatory right here.
But from this point over is technically outside, below my feet.
So we ran the water in a way that it could never freeze.
So you see it come up here, right up in the ceiling, and it feeds down and up to both of the bathrooms so it'll never freeze.
These guys are making unbelievable progress.
They're really moving.
Up here, on the second floor, at the end of the hall used to be two bathrooms.
Now there's only one.
One of them has been replaced by a laundry, a washer and dryer right here where the laundry is generated, near the bedrooms.
Hey, Kordian.
Kordian: Hey, Rich.
Richard: Interesting detail here, huh?
Kordian: Yeah.
This is something that we don't do on every job, but it is quite an interesting detail.
So, we have this framing bump that we made here for this washing-machine box.
Richard: Yeah.
Kordian: And how this works is, when we slide our machine back on the finished stage, we have our hoses connected to it.
They just come up right under here, and they all get hidden inside here, and then an access panel covers this.
Richard: So everything disappears.
Kordian: Yep.
Richard: I love it.
What do you got left to do here?
Kordian: So, I've got my cold water left to connect, and I have a little bit of PVC piping left.
Richard: Let's go.
Let's get it done.
[ Drill motor whirring ] So, that expansion connection is terrific.
You expand the sleeve in the pipe... ...and then just stick it right onto the fitting.
It's a standard PVC connection.
It's got the primer.
It's purple so they make sure that you know you did it.
♪ ♪ ♪ So, the bottom part of that trap makes it complete.
♪ I tell you, this detail's gonna make your beautiful plumbing disappear.
Kordian: Yes, it is.
Richard: All right.
So, we still have a dryer to deal with, right?
Kordian: Yes, I still have to finish running my gas line to that box.
Richard: I like this.
The vent goes right outside to right here.
And you still have one more bathroom.
Kordian: Yes, I do.
Richard: So, I hear they want to reuse the tile, the plumbing fixtures, a new toilet here, and the sink, right?
Kordian: Yeah.
But, unfortunately, we couldn't save the existing plumbing because it was 100 years old.
It was in really bad shape.
Richard: So it's all gonna be new rough waste and plumbing to this.
But it runs through a pretty busy place downstairs, right?
Kordian: Yeah, it does.
Richard: Let's look at that.
Kordian: All right, Rich.
So, we're underneath that bathroom here.
You can see I've got all my piping coming down over here.
It turns into one stack and drops down here in a very critical part of the house.
This is the kitchen.
That's the family room.
Richard: It's really the heart of the house.
I mean, everybody's gonna be here all the time.
Kordian: Yeah.
We've actually decided to use cast-iron in this application.
Richard: Okay.
Not PVC.
PVC is the standard nowadays.
Easy to glue, lasts forever, but cast-iron... Obviously, that's for sound, right?
Kordian: Yes, it's for sound, and I've actually made two samples for you here.
They're both equally full of the same amount of water.
Richard: Okay.
[ Water sloshing ] I know that sound.
That's where they complain.
Kordian: Give this one a try.
[No audio] Richard: That's really a compelling prop.
You should be in television.
[ Both laugh ] All right, but this is more money, though, right?
Kordian: Yes.
This is about three times the cost of the PVC, but we're only doing it in this area of the house.
Richard: Just right here.
The rest of the house, noise doesn't matter.
We just stay with the PVC.
Kordian: That's right.
Richard: All right, good.
So you got all your parts and pieces here?
Kordian: That's right.
I have my cast-iron fittings here, my mechanical couplings here, and my impact driver.
And we're just about ready to get to work.
Richard: Let's get your crew in here.
We got to get rolling here.
Kordian: All right.
Richard: All right.
♪ It's a fast connection, but it's a durable connection.
♪ ♪ So, this cast iron-cutter is quite the tool.
There's a chain that has sharp blades on it, and by applying enough pressure, it'll actually snap that cast iron pipe with a clean cut.
Beautiful.
Now that the cast-iron has run down through the kitchen, Kordian and his crew can transition back to PVC in the basement and connect it back into the main drain.
Zack: Over the family room, originally, there was a roof that pitched this way, which created chronic water issues over here.
The architect designed a new roof to shed the water away from the structure.
I'm gonna work with our roofer, Jose, to detail the flashing so this is watertight.
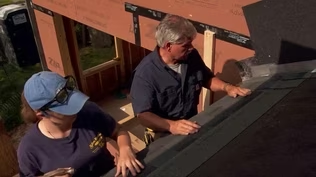
Jose and his crew get started on the drip-edge flashing.
The purpose of this flashing is to keep the water from running along the face of the fascia.
Instead, it will drip off the edge of the flashing and drop directly into the gutter.
He bends the aluminum using a sheet-metal brake.
♪ So, this is the roof sheathing, the gutter's down here, our fascia's behind it.
Next, Jose will make kickout flashing, which is installed where the sloped roof ends and meets the vertical siding.
He takes the flat piece of aluminum and bends it into an L shape.
Next, he creates a fold, which allows the L shape to have a jog in it, which will divert the water away from the siding and into the gutter.
So, here we have the finished drip edge.
That's gonna be installed on the fascia like this, flush with the roof, and it's gonna be held just off the fascia.
So any water that runs off runs off here.
It can drip down into the gutter.
The hero of this story really is, though, this kickout flashing that Jose bent.
That's going to allow any water traveling on the wall to kick out.
So it'll go right here.
The gutter here will capture any water as this is thrown into this area.
And you can see what happens if you don't do that.
So, here, you'll see deterioration and rot caused by a lack of kickout flashing.
The flashing ends right here, and it doesn't direct the water into the gutter, but rather onto this area.
So all of this has rotten out because of the lack of kickout flashing.
So, with the kickout flashing, it's gonna direct the water into this gutter.
We'll never have that problem.
♪ So, once the aluminum flashing is installed, it's time to put in our roof.
In this case, we're using a roof that's made of two sheets because the roof is too low-pitched for us to be comfortable using asphalt shingles.
The first sheet that goes down is the base sheet, which is the primary waterproofing membrane.
It creates a good adhesion base for our top sheet.
That has these mineral granules on it.
And this is going to provide a moisture and UV protection for the roof, and it's all peel and stuck to the roof itself.
♪ Jenn: When you think of cherry blossoms, what comes to mind?
I bet it's the Tidal Basin in Washington, D.C.
But there is a park that has more.
In fact, it has the highest concentration of cherry blossoms in the country, and it's just 4 miles from our project house.
Since the introduction of Japanese cherry trees in the early 20th century, each spring, parks across the U.S.
delight with those signature white and pink blooms.
And at the Essex County Branch Brook Park in Newark, New Jersey, you can see 5,300 trees of 18 different varieties, including the ever popular Yoshino.
But you do need to plan your visit just right to experience the full spectacle.
I'm meeting up with the deputy director of the Essex County Parks and Recreation Department, who will explain why.
Kate: So, Jenn, welcome to Essex County's Branch Brook Park.
Jenn: It's great to be here.
It's my favorite time of year.
Kate: Yeah.
So, right above us here is a Yoshino cherry tree, just like at the Tidal Basin.
Jenn: So that's what everyone comes to see, and I missed it.
Kate: Yep.
And this one is a little bit past peak.
We can see it's already leafing out.
Jenn: So, D.C.
is 10 days ahead?
Kate: Yes.
We're about 10 days after the Tidal Basin, and that's based on our latitude on the map.
National Park Service puts out a prediction, and we go about 10 days after that prediction every year.
Jenn: It's good to know.
It's good to know.
Kate: So, here we have another single-blossom cherry tree, but a weeping variety.
Jenn: A weeping Higan, right?
Kate: That's right.
And this one's starting to lose some of its color 'cause of our weather.
By the end of the day, it probably will start to drop some of its petal.
Jenn: Very beautiful.
And then, as that kind of goes, you transition into the full bloom of this beauty.
Kate: Yes, this Kwanzan Japanese cherry tree is a double blossom.
It has these beautiful ruffled flowers.
These just popped open in the last 24 hours.
Jenn: The Kwanzan has the grand finale, right?
Kate: It really does.
And because of this variety of trees that we have, we have a bloom season that lasts three weeks, much longer than the Tidal Basin.
Jenn: So, if someone's coming to plan their visit, they should look at the weather, 'cause it's not the winter weather, right?
It is this current spring weather.
So you have to follow the heat in the night, in the morning, in the day, the longevity of it, right?
Kate: Absolutely.
So, the winter really doesn't have a huge impact on when we bloom.
But what's happening every day during those three weeks really can change the outcome of the tree.
So when you're planning your visit and you're looking at the weather, you want to stay away from any days where you have rain or wind or extreme temperatures.
Jenn: Right.
You can't dictate Mother Nature.
Kate: That's right.
♪ So, Jenn, Essex County's Branch Brook Park is the first county park in the country.
Jenn: The first?
Kate: Yes.
And it's designed by the Olmsted Brothers.
Jenn: Of course it was.
I mean, inspiration to us all.
We've got Central Park.
The Emerald Necklace in Boston.
Shelburne Farms in Vermont.
The list goes on.
Kate: That's right.
But the cherry trees were not part of their original design.
Jenn: Really?
Kate: Yes.
Jenn: So, how did that come to be?
Kate: Back in 1927, a prominent Newark family donated the trees here to the park.
Kevin: So, how many trees did they donate?
Kate: So, they donated 2,000 trees, but by the early 2000s, there were less than 600, because the trees only have a 70- to 80-year lifespan.
Jenn: Right.
So you have to have the upkeep to keep it going.
I mean, how did this whole process -- who did the installation?
Kate: Right.
So, by the early 2000s, we had less than 600 trees, and a group of volunteers came out, wanting to replant the park.
Jenn: It's always led by the volunteers, right?
Kate: That's right.
And we have the volunteers to thank today, not just for these trees but for maintaining these beautiful beds and trees five days a week.
Jenn: The power of the volunteer.
So, if someone was visiting the park, what would be your golden rule to say to everyone?
Kate: All of our visitors should take pictures.
Don't take the petals home.
Kevin: Right.
And why?
Kate: Because it leaves the trees open to disease, and we want to preserve them for the next generation.
Jenn: Those are good words.
I'll pass it on, too, to whoever I see.
But thank you for my tour.
Kate: All right.
Thanks, Jenn.
♪ Kevin: Zack, back in your primary bathroom, where we followed every step of this so far.
What are we working on today?
Zack: So, now that the plumbing rough-in is done, we're on to electric.
And the thing that's sort of hardest to coordinate is a bathroom vent fan, because you have to coordinate HVAC contractor, a carpenter, and the electrician to connect the fan.
Kevin: Okay.
What's required in a bathroom for ventilation, and what are you thinking of using?
Zack: Yeah.
So, what's required is, really, you either have to have a window or mechanical ventilation like a fan.
That's what the code asks for.
Kevin: So we're not gonna rely on that.
So we're gonna go mechanical.
What are you thinking?
Zack: Right.
So, we're gonna basically locate the fan just outside of the shower.
Some manufacturers of fans don't allow it to be in a wet location.
So we typically just put it just outside.
And then, because there's a water closet where the toilet will be in here, we're going to have additional ventilation in there, so we have sort of two separate suction points.
Kevin: So, moisture, smell, get them both out of here.
Zack: Yep.
Kevin: That's where you want to go.
What do you want to use?
Zack: I'll show you.
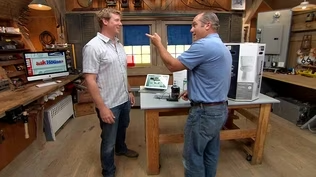
So, we just happened to have some vent fans right here.
Kevin: It's like a Richard show-and-tell.
All right.
I'm familiar with these.
I've seen a lot of them in my day.
Zack: Yeah.
So, this is going in the powder room downstairs.
And this is, you know, a fan mounted in a box, goes on the ceiling, vents to the exterior, and there's adjustable CFM for different-sized rooms.
Kevin: And then, we're all familiar with this, right?
So this is the register that we see.
And I've seen them with lights built in.
Obviously, that's a choice.
Zack: It is a choice.
I mean, it's very functional, but, honestly, it doesn't look great when you have that little light in the middle of it.
Kevin: Yeah.
That's -- I've got two of them in my house, but I'm fine.
It's okay.
Zack: [ Laughs ] So, there is a solution for that, though.
If you don't have a light like we don't in the powder room, if we decide to color-drench the ceiling, paint it black or dark green, for example, we can mount the fan in this recessed metal box that gets taped into the plasterboard.
And then we put this metal cover, we paint it the same color as the ceiling, and then you just have this slot that goes around, and the air can flow through that instead.
Kevin: Nice sleek look.
Got it.
And so this one's going into a powder room.
Zack: Right.
And then, we do have a light/fan combo here.
So it's like a recessed light.
This is going in the guest bathroom, which we're not gutting, but we are adding this light/fan combo 'cause there's no fan, and there's no light in the ceiling.
And this has this bulb that goes in the center of it, and then the air gets sucked in around it and exits out the side.
Kevin: And so, like this one, though, it's all one integrated unit.
So, you have the motor, you have the housing, you have the trim kit all in one.
Zack: Exactly.
And then, in the primary bathroom, we're going with what's called an inline fan.
So, here's the fan.
It's in the line of the ductwork.
So we have the intake, the exhaust, this goes out the sidewall vent.
And then you'll see it comes into this Y fitting here, which is then directing the suction to these two registers here.
So, the nice thing is this is far away from where your ear is, so you don't really hear the unit, but you do need access to it wherever you put it.
Kevin: And in terms of -- I mean, because we've got -- this is for where the toilet is, this is just in front of the shower, because we've got two intakes and potentially could have a long run, are you concerned about having enough CFM?
Zack: You don't need more CFM, but this is quite a bit more powerful just because we know they'll be using that shower frequently, twice a day, at least, and we want that steam to be pulled from the room quickly.
And it's, you know, pulling from two locations.
So this is about 60 CFM more powerful than this unit.
Kevin: Cool.
All right.
So a little bit of everything going in this house.
Zack: Yeah.
So, we're gonna put these in now.
Kevin: All right.
Well, thank you, Zack.
Zack: All right.
Hey, Matt.
Matt: Hey, Zack.
How's it going?
Zack: Very good.
Got these boxes for you.
Matt: Perfect.
We are just laying out the centers here.
Zack: All right.
Matt: 30... Zack: Get these bars installed.
Matt: Looks like we're ready for the first one.
Zack: Okay.
So, you can put that a little bit higher because I'm gonna put an extension ring on it to bring it down.
Matt: Okay.
All right, perfect.
Zack: So it fits up between those.
That's perfectly fine up there.
[ Drill motor whirring ] [ Drill motor whirring ] Got this elbow so you can mark out where the hole is there.
[ Drill motor whirring ] Beautiful.
There you go -- the elbow.
Matt: All right.
Zack: See if that's lined up.
Matt: Yeah.
We'll get this 90 on, get it all prepped for the mechanical contractor.
All right.
Looks good.
Zack: All right.
You want to throw this... Matt: Yeah.
Zack: ...grill up there?
Matt: This grill.
We will just test fit, make sure.
It's a nice snug fit.
Okay.
There we go.
Zack: Perfect.
Looks good.
Matt: All right, we're gonna put the last grill housing here in the water closet.
We're gonna put it closer to the door, maybe so we don't see it when we're coming in.
Zack: I like that.
Matt: Stay a little hidden.
We'll mark it.
All right.
Looks like we're ready.
Thank you.
All right.
This one will be maybe a little closer to the center, but we're always battling with the ceiling -- the ceiling joists when we're doing the exhaust fans or grill adapters -- grill housings, I should say.
[ Drill motor whirring ] Hey, Zack, I'm ready for the elbow.
Okay, we're all set.
Zack: Okay.
So, what's next?
Matt: We're gonna install the inline motor inside the third-floor attic space/crawl space.
Zack: All right.
It's nice and far away.
Matt: Yes.
Zack: So, how are you controlling this fan?
Matt: So, we could do either a single-pull switch, a timer switch, which will go from 5 all the way up to 60 minutes, and then, lastly, would be, like, a humidity-sensing switch.
Zack: Okay.
What's your preference?
Matt: Preference for this application is gonna be a timer switch.
Zack: All right.
Why is that?
Matt: That way, they're not gonna have the fan running too long when they're done, say, taking a shower, and it's humid in here.
The fan can run after they already leave the bathroom to make sure all that humid air gets out.
Zack: That makes sense.
I think a lot of people don't realize just how much air is being moved.
Like, a fan that's 150 CFM can pull as much as 250,000 cubic feet of air in a roughly 24-hour period, which is four times more air than this whole house holds.
Matt: That's a lot of conditioned air leaving.
Zack: Yeah.
So, just being able to turn it on and know that it's gonna kick off in five minutes saves you a lot of money on your heating bill.
Matt: Sure.
Perfect.
Zack: All right.
Let's get the other fans installed.
Matt: Let's do it.
♪ ♪ ♪ Kevin: Oh, look at you.
Back to the Gantt chart, huh?
Zack: Yeah.
Kevin: So, let's see.
Last week, you were telling me we were, what, a week or two behind, but there was some padding?
Where are we now?
Zack: Believe it or not, we're still a week or two behind.
[ Laughter ] But as of today, we can cross roofing off the list.
Richard: The plumber's just about done, right?
Zack: Yeah.
So then, we just got this big guy, rough electric, to wrap up before we can go on to inspections.
Kevin: And how are you feeling about that?
Zack: All three of them are working upstairs right now.
Richard: What's his number?
Matt!
Zack: Matt!
You good?
[ Laughter ] Kevin: Well, I guess we're gonna find out together.
So, until next time, I'm Kevin O'Connor.
Richard: I'm Rich Trethewey.
Zack: And I'm Zack Dettmore.
Kevin: For "This Old House" down here in New Jersey.
♪ Kevin: Next time on "This Old House"... Zack and his guys built this full-scale model, complete with a toilet... Zack: Here it comes.
Kevin: ...to show that, when it comes to a sewer line, bigger isn't always better.
Wow.
A lot slower.
Zack: And we'll show you how to fix creaky old stairs like this.
[ Drill motor whirring ] Woman: And why ordering your finishes early can save you time and money.
♪ Kevin: That's next time.


- Home and How To

Hit the road in a classic car for a tour through Great Britain with two antiques experts.

 New Episode
 New Episode


 New Episode







Support for PBS provided by:
Funding for THIS OLD HOUSE is provided by The Home Depot and Renewal By Andersen.