Shareable Spanish Fare
1/8/2022 | 24m 53sVideo has Closed Captions
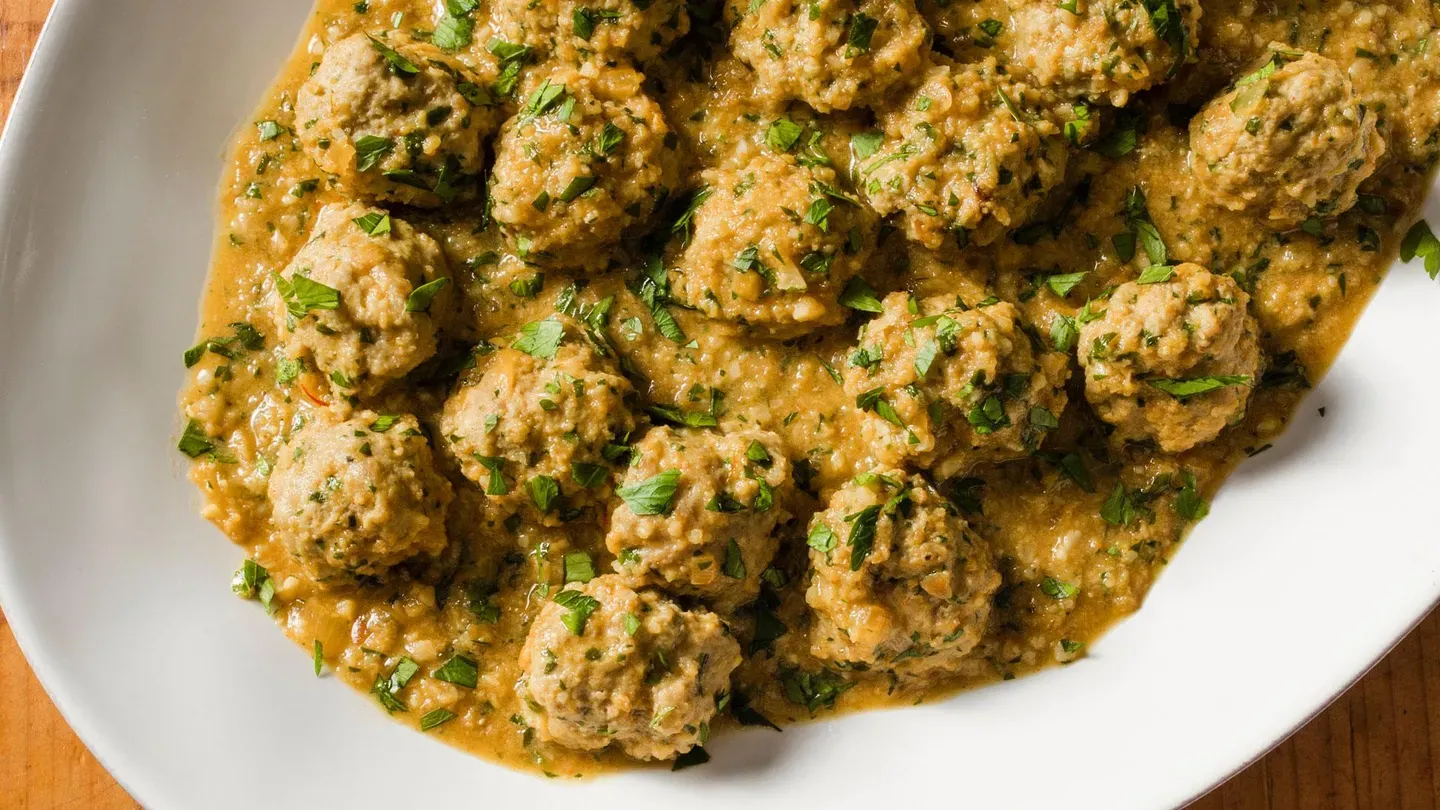
Spanish-Style Meatballs in Almond Sauce and Andalusian Spinach and Chickpeas.
Test cook Keith Dresser shows host Bridget Lancaster how to make Albóndigas en Salsa Almendras (Spanish-Style Meatballs in Almond Sauce). Jack talks about olives and science expert Dan Souza reveals the science of energy transfer in liquids. Test cook Becky Hays shows host Julia Collin Davison how to make Espinacas Con Garbanzos (Andalusian Spinach and Chickpeas).
America's Test Kitchen is presented by your local public television station.
Distributed nationally by American Public Television
Shareable Spanish Fare
1/8/2022 | 24m 53sVideo has Closed Captions
Test cook Keith Dresser shows host Bridget Lancaster how to make Albóndigas en Salsa Almendras (Spanish-Style Meatballs in Almond Sauce). Jack talks about olives and science expert Dan Souza reveals the science of energy transfer in liquids. Test cook Becky Hays shows host Julia Collin Davison how to make Espinacas Con Garbanzos (Andalusian Spinach and Chickpeas).
How to Watch America's Test Kitchen
America's Test Kitchen is available to stream on pbs.org and the free PBS App, available on iPhone, Apple TV, Android TV, Android smartphones, Amazon Fire TV, Amazon Fire Tablet, Roku, Samsung Smart TV, and Vizio.
Providing Support for PBS.org
Learn Moreabout PBS online sponsorship♪♪ ♪♪ ♪♪ ♪♪ -Today on "America's Test Kitchen," Keith cooks Bridget albondigas in salsa almendras; Jack talks olives; Dan uncovers the science behind heating liquids; Adam reveals his top pick for meat pounders; and Becky makes Julia espinacas con garbanzos.
It's all coming up right here on "America's Test Kitchen."
♪♪ -Today, we're making a Spanish tapas classic, albondigas.
These saucy little meatballs are great on their own or as part of a tapas spread.
And Keith is here.
He's going to show us how to make a great version at home.
-Yeah, most people are familiar with this dish when the meatballs are cooked in a robust tomato sauce, but we're going to make a different version today.
So in this version, we're going to cook the meatballs in a sauce that's spiked with paprika and a little bit of saffron, and it's thickened and flavored with a piccata.
We're actually going to start with that piccata.
-Okay.
-Now, piccata is an important element in Catalan cooking.
It's a combination of ground nuts and bread that's toasted in olive oil with a combination of parsley and garlic.
It really is a cornerstone to this type of cooking.
So I'm going to start with 1/4 cup of slivered almonds, process for about 20 seconds until the nuts are finely ground.
-Okay.
-That looks good.
Now for the bread.
I'm just using white sandwich bread here.
I'm going to tear this into 1-inch pieces.
You can use different types of bread here.
You can use stale bread if you have it, but most people have a sandwich bread in their home, so that's what we're using today.
-Perfect.
-I'm going to process that until finely chopped, about 15 seconds.
Now for the toasting, I'm just going to take this, and I'm going to transfer this to a 12-inch nonstick skillet.
I have 2 tablespoons of extra virgin olive oil.
Want that peppery bite -- it's going to be great with the toasted nuts.
I'm just going to put this over medium heat, and I'm just going to stir this almost constantly -- we don't want this to burn -- for 3 to 5 minutes until it's nice and golden brown.
-Okay.
-Piccata is golden brown, fragrant, smells great, doesn't it?
-Fantastic.
-Okay, I'm just going to take this out of the pan.
I'm going to add 3 tablespoons of chopped parsley, 2 minced garlic cloves.
I'm just going to stir this together.
So this is our piccata, that's all set ready to go.
We can set that aside for later.
-Okay.
-Now for the meatballs, we're going to start with a panade, and the panade is a mixture of bread and some sort of liquid.
So I have one slice of sandwich bread.
I'm just going to tear this into 1-inch pieces.
So we're just going to process this for 15 seconds until it's finely ground.
-Okay.
-Okay, that looks good.
Now for the liquid component.
We have 1 large egg, 2 tablespoons of water.
We're also going to flavor this with 1 tablespoon of minced parsley, 2 minced garlic cloves, 1 teaspoon of table salt, and 1/2 teaspoon of pepper.
Going to process until smooth, about 20 seconds.
Okay.
Perfection.
Now, we have our panade.
I'm going to add our ground pork.
So I'm just going to add 1 pound of ground pork.
Now I don't want to process this too much.
We only want to work the panade in.
We want to keep these nice and tender.
So I'm just going to pulse this 5 pulses just to incorporate that panade into the meat.
-Okay.
-Okay, it's time to shape our meatballs, and we're going to do these fairly small -- these are our tapas, so we only want 1-inch meatballs.
I'm gonna nice heaping tablespoon measure.
I'll just take that off with my thumb.
Moisten my palm a little bit like that.
Nice and lightly, we don't want to really pack this down.
-I'm happy to help if you want to... -Here you go.
-Will work for meatballs.
-[ Chuckles ] Okay, we're going to keep shaping these, and we're going to end up with about 24 1-inch meatballs, and then we can cook them.
-Great.
-It's time to cook the meatballs.
Now, we're going to reverse things a little bit.
Typically, when we're making meatballs, we like to brown them in a skillet and then finish them in a sauce.
-Right.
-But we are actually going to build the sauce first and then finish the meatballs in that.
-Okay.
-The reason why is because these meatballs are fairly small, and when we browned them, we didn't like the tough exterior that they got.
So I have 12-inch nonstick skillet with 1 tablespoon of olive oil, and we're just going to turn this on medium heat and I'm going to let that oil come up to a shimmer.
-Great.
-Okay, so I have 1/2 cup of onion here.
It's not a lot of onion.
We just want a small amount to flavor that sauce.
So we're just going to cook this for about 4 minutes until the onion is nice and soft.
-All right.
-It's been 4 minutes, and you can see that the onions softened.
You'll get a little bit of color in there, and I'm going to add 1/2 teaspoon of paprika to this.
We're going to just cook this out until it's fragrant.
-And this is just standard paprika, right?
-This is just standard sweet paprika.
Now we have a cup of chicken broth.
It's going to add a little bit of body to this sauce, a little bit of richness.
Also going to add 1/2 cup of dry white wine, which will add some acidity.
-Very nice.
-So we have our broth and our wine in there, and I'm just going to bring this up to a simmer.
-Okay.
-So our broth is at a simmer and I have one more addition.
I have 1/4 teaspoon of saffron threads here.
And I'm just going to crumble this into our broth.
Just a little bit of saffron.
Saffron can overpower a dish really, really quickly.
So we just need a small amount.
So we'll just let that saffron bloom in there and then we can add our meatballs.
-So basically poaching them?
-We are going to poach them, steam them more like -- we don't really want to boil these, right?
We just have a small amount of liquid in here.
-Right.
-Space these apart a little bit.
Okay, so I'm going to cover this and we're gonna cook this 6 to 8 minutes.
I'm going to come in and flip them once halfway through.
It's been 3 minutes, and I want to go in here and turn the meatballs so they cook evenly, and you can see how that trapped steam has started to cook the top of these meatballs.
-It's set them a little bit.
-It's unusual that we're not browning here, but this sauce is going to be so flavorful that we won't miss that browning.
-Browning does add some rich, hearty flavor, but you're looking for a lighter flavor here.
And also, it's that really nice tender texture.
It's a beautiful shade of yellow from the saffron.
-Yeah, the saffron really adds a nice color.
Meatballs are turned over, put the lid on, go for another 3 minutes until the meatballs reach 160 degrees.
It's been 6 minutes, and we want to check the temperature of our meatballs.
So I'm looking for 160 here.
Perfect -- 160 degrees.
Okay, so in goes our piccata that we made earlier.
-Lovely.
-Isn't that great.
Okay, so I'm just going to stir this in.
You can start to see, almost immediately, it thickens that sauce up.
-The bread crumbs and the almonds in there.
-You can smell that toasty bread right now.
That is all incorporated in there, and we're just going to let this simmer for 1 to 2 minutes more, and that will make sure that that sauce is really nice and thick and all those flavors have bloomed.
Our piccata has worked its magic, and it's thickened our sauce nicely.
And I'm just gonna cut the heat and add 1 teaspoon of sherry vinegar.
-Oh!
-Just a little bit of acidity to balance out the richness of the almonds and that olive oil.
-That's thickened up beautifully, though.
-Yeah, see how tight that sauce is?
-Yes.
-It's nice, and it coats the meatballs really nicely.
-Lovely.
-Okay.
So over to our platter here.
I have 1 more tablespoon of minced parsley for some freshness and color.
-That is beautiful.
-It is beautiful, isn't it?
Time to eat.
Now, typically, this would be served with other tapas.
-But you could serve this with rice or potatoes, and it would be great as well.
Mmm!
Really tender.
-Meatballs are mild, but that sauce has a ton of flavor that it's bringing to the dish.
-This is beautifully rich.
The almonds, too -- toasty.
-And the saffron, there's just enough there to taste the earthiness of the saffron, but not to overpower with the almonds, which are actually quite mild.
-The white wine and then the sherry vinegar at the end?
Perfect.
-Yeah, just the right level of richness, acidity, spiciness.
-And I'm not missing any browned exterior on the meatballs at all.
It's got a beautiful, clean flavor.
This is fabulous.
Thanks, Keith.
-You're welcome.
-Well, if you want to make these beautiful albondigas at home, pulse ground pork into a mixture of bread and spices, simmer the meatballs right in the sauce, and then thicken with a piccata.
So from "America's Test Kitchen," tasty, tender and tapas-ready albondigas in salsa almendras.
♪♪ -Come with me on a little journey.
We're in Tuscany.
We're walking through a beautiful olive grove.
You reach up, you grab an olive from the tree, and you pluck it in your mouth -- and then you immediately spit it out.
It is the most inedible thing you've probably ever tried to eat.
And it's because it's so profoundly bitter.
Olives have a compound called oleuropein that must be removed.
They're cured in three different ways, and the curing process can take up to a year in order to make them something so delicious.
At the same time, the natural sugars in the olives -- because remember, they're fruits, so they have a lot of sugar -- is converted to lactic acid, so you get that fermented olive-y flavor.
First is salt cured -- I have them here.
You always know they're salt cured because they're a little wrinkly.
And it's just what it might sound like -- they're cured with salt.
Now you will sometimes see these labeled in the supermarket as "oil cured," but really, they're salt cured and then they're put in oil when the curing process is done.
So the oil's not really doing the curing, the salt is.
Second choice is lye -- these are canned olives, black Mission.
Lye not only removes all the bitterness, it removes all of the flavor and gives the olives a terrible texture.
Don't ever buy canned olives, please.
Most of the olives that we use in the Kitchen are brine cured, and that's just what it sounds like.
It's a mixture of salt and vinegar, so you get a little bit more acidity and puckery-ness.
I've got five brine-cured olives here.
You'll see that they're green and they're black, and really, all olives are green, and if they're under-ripe when they're picked, that's the color; or when they're fully ripe, they are black.
The green olives are a little bit crisper, a little bit more delicate in flavor, a little bit more floral.
Black olives -- more robust and more earthy.
I've got here -- these are Spanish olives, and these are stuffed with pimento.
They're crisp and lovely.
These little teeny Picholine, they have kind of large pits, but they're really quite nice.
They're kind of like a green apple, almost.
These are my favorite, the Castelvetrano.
I like to call these starter olives.
If you're somebody who thinks you don't like olives, You need to try Castelvetrano.
It's a Sicilian olive, it's really buttery and has a mild flavor.
Next up, Kalamatas, they're probably the olive we use most here in the Test Kitchen.
They're very earthy and chewy and absolutely wonderful on an antipasto or in a salad or in a pasta sauce.
And last but not least, Niçoise.
These are for people who like to work hard for their food.
It's a lot of pit without a lot of meat, but, oh, the olive is so delicious.
So there you have it, the wonderful wide world of olives.
♪♪ -In front of me, I have two pots of liquid, both heated to 140 degrees Fahrenheit.
In one, I have just plain water.
And in the other I have duck fat.
And now I'm going to stick a finger in each and see how long I can hold it there.
Now remember, 140 degrees is a fully cooked pork chop.
[ Inhales sharply ] Okay.
I couldn't hold my finger in that water for even a second longer.
My finger in the fat, however, feels like it's in a cozy, warm bath.
So even though these two pots are at the same temperature, they actually contain very different amounts of energy.
It takes two times more energy to heat a pot of water to 140 degrees than it does the same volume of fat.
All that additional energy in the liquid is then transferred to whatever you put in the pot.
In this case, my finger cooks a lot faster in the water than it does in the fat.
Now, beyond fingers, there are really practical applications for this.
For example, in confit, when you cook in fat at low temperature, you produce more tender and juicy results than you ever could cooking in water.
Just going to keep this cooking.
♪♪ -Before you sauté that schnitzel or braise some braciole, you're going to need to take a thick cut of meat and pound it until it's very thin.
Well, good thing Adam is here, and he's going to tell us which meat pounder is up for the task.
-Before I do that, I'm going to give you a confession.
-Uh-oh.
-Before I had a meat pounder to call my very own, I just grabbed whatever skillet or saucepan was nearby and started whacking whatever it was cutlet that I had to make with that.
-Yeah, I was a rolling pin lady.
-You know, it works, but it's not really given to much precision... -True.
-...which is why we think every kitchen should have a meat pounder.
We tested this lineup of eight different meat pounders.
-Very different.
-Get the price range.
We got these for between $11 at the low end and $125 for a meat pounder.
-What?!
-Can you believe that?
We had a testing squad that had different-sized hands and dominant hands, and they all used them to pound out boneless, skinless chicken breasts and pork tenderloin... -Oh.
-...into nice, thin, even quarter-inch cutlets.
-Which is important for even cooking.
-Definitely.
You've got to have them nice and even.
So you'll notice, perhaps, that some of them have a spiky side and a smooth side.
-Kind of a retro thing.
-A little bit of retro thing.
-Remember the little wooden ones?
-You know, the spiky side is like the old wooden ones, and it's meant to tenderize a really tough cut of meat.
-Right.
-We didn't test that 'cause we just don't see it in recipes anymore.
-True.
-So we tested the smooth side.
This one, a mallet style, has the form factor of a hammer.
Didn't love these because what happens is the square head is kind of small, and if testers weren't super careful, they would get the corners onto the meat, and it would make little dents and gouges into the cutlet.
They had to be super careful, so we get rid of the two mallet style.
-Making Swiss cheese out of meat.
-We don't want to do that.
-No.
-These three in front of me all have offset handles.
Testers weren't mad about these for a couple of reasons.
I want you to give this one a try.
This was the really expensive one.
-Geez!
Holy moly.
You could do some damage there.
-That was one of the reasons testers didn't like it.
That's two and a half pounds.
That's a lot of weight.
And between that weight and the offset handle, give it a -- give it a go on that chicken cutlet there.
-All right.
I'm going to do this one.
-Go for it.
-Oh, well, it makes mincemeat out of chicken breasts.
-In three strokes, you flatten the whole thing.
They were actually very efficient, but testers found that they were sort of awkward and uncomfortable to keep lifting and pounding with.
-Yeah.
I could see that.
-Because of this offset handle.
And because of the weight, they were almost too good at what they did.
Also, sometimes you would get the heel instead of the full flat force of the head on there, and you would get, again, dents and gouges.
The last style are in front of you, and those have vertical handles.
These didn't weigh quite as much.
This one was a pound and three quarters.
You want to give that one a go?
-Yeah.
Sure.
-See what you think.
-Sure thing.
Yeah.
Takes a little bit more time, but it's doing the job.
-Those were not as heavy, which testers liked.
They felt like they were a little easier to pick up and wield.
Now, you can see that the handle is vertical to the head, and right where your hand is absorbs some of the shock of the pound.
Some testers didn't like that.
Others loved it because they felt like it added precision and control that a lot of the other ones didn't have.
The handle on that one was particularly good because it was about four inches tall and almost three inches wide at the widest spot.
And it was covered in Santoprene, so it had a nice, secure grip, whereas this thing got a little slick once you were done pounding everything you were pounding.
-The flat handle, too, was a little uncomfortable.
-Not super comfortable.
So, in fact, that one is the winner, and it gets its name from its nifty handle.
It's the Norpro Grip-EZ Meat Pounder.
It was about $20, and it was everything we could ask for in a meat pounder.
I am retiring my sauté pan now.
-And I shall retire my rolling pin or just use it for pastry.
-Excellent.
-There you go.
If you want to buy the winner, it's the Norpro Grip-EZ Meat Pounder, and it retails for about $20.
♪♪ Espinacas con Garbanzos, which is Spanish for spinach with chickpeas, is a popular dish in Seville.
It's often served as a shared bar plate, a ración, but it also serves as a nice, quick midweek dinner, and Becky is here to tell us more.
-That's right, spinach and chickpeas.
-Mm-hmm.
-Like you said, this is a really popular dish you'll see in nearly every civilian taverna where friends will gather and they'll eat it from a common cazuela, which is their shallow casserole.
-Mm!
-Now, a lot of recipes call for dried chickpeas, but you will see some recipes that call for canned.
-Mm-hmm.
-And we found that good quality canned chickpeas really have everything that we're looking for in a bean.
They're tender, they're evenly cooked, and they have that really nice, thick cooking liquid... -Yeah.
-...that's well seasoned.
I have one can where we're going to use all of that starchy cooking liquid.
We're going to put that right in the pot here.
And then I drained the other can.
If we use liquid from two cans, it would be too much starch.
I have one and a half cups of chicken broth.
-Mm-hmm.
-Put that in.
So I'm going to bring this to a boil.
So, while those cook away, let's start on a picada, which is a common thickener for this recipe.
We're going to be serving this with some bread, so I already cut off about one and a half ounces.
I'm gonna tear it into one-inch pieces.
In the food processor.
So we're going to grind this up.
We want it finely ground.
Okay, that looks good.
Those are finely ground.
All right, so we have our finely ground crumbs, and I have a quarter cup of extra virgin olive oil.
So we're going to toast up those crumbs.
We're heating it over a medium heat here.
We just want them to get nice and golden brown.
It's going to take three to four minutes.
So I see that our chickpeas are just coming up to a boil there.
So if you want to turn it down to a gentle simmer.
-Sure thing.
-And we'll let those go for about 10 minutes just until the liquid is just below the top of the chickpeas.
-Okay.
-These look like they're just about done.
-Oh, they're gorgeous.
-That took about three minutes.
So we can set those aside.
So, while the chickpeas finish, let's work with a couple of tomatoes here.
That's going to bring some nice acidity to the dish.
-Mm-hmm.
-And I'm using plum tomatoes that are really meaty.
And I'm actually going to grate these guys.
-Interesting.
-Yeah.
This is a nice way to get some tomato pulp that will sort of melt into the dish and it'll leave the skins behind because we don't want those little skin pieces in.
I'm just going to grate it and we'll leave behind the skin.
When we get close to the skin, I'll stop.
And you can see the tomato pulp coming out the bottom there.
All right, I'm just going to finish grating these, and then we'll clean up a little bit.
-Okay.
-All right.
Let's finish up our picada here, which is going to thicken the stew and also add tons of flavor.
-Okay.
-So I have six cloves of garlic going in.
-Mm-hmm.
That's a lot.
-Oh, yeah.
This is a full-flavored stew.
This is going to be really satisfying.
To get even better, a tablespoon of smoked paprika.
-Oh.
I'm adding a teaspoon of cumin.
And then, a quarter teaspoon of salt.
And then, sometimes you see a little bit of cinnamon.
We really like the depth that that provided, so an eighth teaspoon of cinnamon.
Same thing for cayenne pepper.
Nice little kick.
Gonna add an eighth of a teaspoon of that.
And then just a pinch, small pinch of saffron.
-Mm!
-And that'll add a nice kind of background nuttiness and a nice golden color.
Little bit goes a long way with saffron.
-Yeah, it's true.
-So we just want to cook this for 30 seconds until it's aromatic.
And I'm really enjoying this right now.
-Me, too.
-Now I'm going to add those tomatoes that we grated.
-Mm-hmm.
So it's not about keeping those breadcrumbs crisp.
They're there for that brown, toasted flavor.
-That's it.
They're going to get soggy.
That's okay.
And now I'm adding 4 teaspoons of sherry vinegar.
-Ooh.
-You could use red wine vinegar.
I'm turning off the heat here, too.
The sherry vinegar will make this rich dish a little less rich.
-Gotcha.
Just cut through that fat a little bit.
-Mm-hmm.
-All right.
That smells amazing.
-That smells really good.
-So let's add the picada to our chickpeas.
You can see the liquid level is just below the tops of the beans there.
Stir that in.
And then, I have 10 ounces of frozen spinach that's been thawed and squeezed really dry.
And you might say, "Why not use fresh?"
But frozen spinach actually has a nicer texture.
-Interesting.
-It's also really convenient.
It's inexpensive.
-Mm-hmm.
-You can store it in your freezer.
It's always at the ready.
It's really our top choice for this recipe.
-Wow.
Well, I like how quick it makes this recipe, not having to paw through all that fresh spinach.
-Yeah, that can be a big job.
-Yeah.
-So we're going to let this simmer for five to 10 minutes, just until it thickens up a little bit, and then, it'll be time to eat.
-Okay, so, using frozen spinach in this recipe is not only convenient, but it actually tastes better than if we used fresh.
Here's why.
Leaves of spinach are full of water, held in compartments inside the cells of the plant.
As fresh spinach cooks, the cell walls soften from the heat and the water slowly leaks out.
This makes the leaves soft, but they still retain a chewy bite.
When spinach is frozen, the water inside the cells expands, forming sharp-edged crystals of ice that puncture the cell walls.
Then, when it thaws, the melting water flows out of the ruptured cells, leaving behind tender, limp leaves.
And in this dish, that tender texture is exactly what we're looking for.
-All right, so our stew finished up, and then, I added two more tablespoons of olive oil.
This should really be glistening with that delicious olive oil.
-Mm!
-And now I let it sit off the heat for five minutes just to let everything come together.
-Okay.
-So now it's time to enjoy.
So you can see it thickened up really nicely.
-Yeah.
-Into our cazuela here.
-The aromas of the smoked paprika.
And I can actually smell the spinach.
It's wonderful.
-Yeah, you can smell the garlic, the sherry vinegar.
-Mm!
I'm excited for this.
-Those chickpeas got so tender.
-Mm.
It has such a complex flavor.
-It really does.
-Mm!
-So satisfying.
-Mm.
-I'm going to get some bread in there.
-Oh, this would taste really good on a cold winter's day.
-Mm-hmm.
-Becky, this is terrific.
-Thank you.
-Thank you for showing me how to make this.
-My pleasure.
-To make this classic dish from Seville, start by simmering canned chickpeas in chicken broth.
Toast breadcrumbs in olive oil with a handful of spices, and add the frozen spinach just towards the end of cooking.
from "America's Test Kitchen," a satisfying recipe for Espinacas con Garbanzos.
You can get this recipe and all the recipes and product reviews from this season, along with select episodes at our website, americastestkitchen.com/tv.
Can't believe how quickly this came together.
-I know.
It's so good.
-Mm.
-I love it so much.
-Mm.
♪♪ ♪♪


America's Test Kitchen is presented by your local public television station.
Distributed nationally by American Public Television