Rustic Italian Fare
1/2/2021 | 24m 12sVideo has Closed Captions
Host Bridget Lancaster makes a hearty Acquacotta (Tuscan White Bean and Escarole Soup).
Host Bridget Lancaster makes a hearty Acquacotta (Tuscan White Bean and Escarole Soup), ingredient expert Jack Bishop shares tips for buying extra-virgin olive oil, and test cook Keith Dresser makes easy Piadine (Italian Flatbreads).
America's Test Kitchen is presented by your local public television station.
Distributed nationally by American Public Television
Rustic Italian Fare
1/2/2021 | 24m 12sVideo has Closed Captions
Host Bridget Lancaster makes a hearty Acquacotta (Tuscan White Bean and Escarole Soup), ingredient expert Jack Bishop shares tips for buying extra-virgin olive oil, and test cook Keith Dresser makes easy Piadine (Italian Flatbreads).
How to Watch America's Test Kitchen
America's Test Kitchen is available to stream on pbs.org and the free PBS App, available on iPhone, Apple TV, Android TV, Android smartphones, Amazon Fire TV, Amazon Fire Tablet, Roku, Samsung Smart TV, and Vizio.
Providing Support for PBS.org
Learn Moreabout PBS online sponsorship♪♪ ♪♪ ♪♪ ♪♪ -Welcome to "America's Test Kitchen" at home.
Today, I'm cooking a hearty batch of acquacotta, Jack's going to tell us all about shopping for olive oil, and Keith's making a quick and easy piadine.
We've got a lot in store for you today, so stick around.
♪♪ -If you were to stop by my house, there's a really good chance that there would be a big pot of bean soup cooking at any given moment.
It's one of my favorite soups to cook, and I love all variations.
But today I'm going to make for you one of my very favorites.
It's acquacotta, and it comes from Tuscany, and it means "cooked water."
But there's a lot more flavor involved than just water.
So, we're going to start off with our aromatics.
Now, we're making a sofrito with a combination of onion, celery, and garlic.
I'm going to get the food processor to do some of the work for me.
So all I need to do at this point is chop this onion pretty rough.
Basically, I'm just cutting this into large pieces, nice and coarse.
Do the second side.
Alright.
This is all going into my food processor.
Next up, a couple of celery ribs.
Now, I am going to get rid of these little leaves.
You don't have to.
You could put them in there.
But for now, two whole ribs of celery is fine.
So, just like the onions, I'm going to chop these coarse.
Same thing -- goes right into the food processor.
Alright.
We need a few cloves of garlic, so, four for our recipe.
I'm just going to smash them with the side of my knife, peel them, and then put the cloves right in.
Alright.
So, I want to pulse this until they're pretty finely chopped.
That's going to take anywhere between 15 to 20 pulses.
But I'm going to have my rubber spatula at the ready so I can go in there and scrape down the sides as necessary.
Alright.
So, that looks great.
It's nice and well chopped.
So, I'm going to put this mixture in my Dutch oven.
Next up, 1/2 cup of extra virgin olive oil.
And we need to add some seasonings at this point.
Going to add 3/4 teaspoon of salt -- This is just table salt -- and 1/8 teaspoon of red pepper flakes.
So, now I'm going to turn the heat under the pan to medium-high.
Give this a nice stir, and I'm going to keep cooking this.
I'll stir it every once in a while for about 12 to 15 minutes until I see some beautiful fond on the bottom of the pan.
But in the meantime, got a little bit more prep to do here.
Acquacotta always contains tomatoes, and this is just a 28-ounce can of whole tomatoes packed in juice.
Lid goes on, and similar to the sofrito, I'm going to pulse this about 10 or 12 pulses until it's all nice and finely chopped.
Alright.
So, that looks good.
Tomatoes are finely chopped, and now all we need to do is wait for the sofrito to cook.
Oh, look at the browning in the bottom of the pot.
That is some good flavor.
The vegetables are softened.
So now I'm going to go ahead and add those tomatoes to our pot.
So, I'm going to stir in these tomatoes and increase the heat to high.
And I want to cook this until the tomatoes are really, really thickened, concentrate their flavor.
And I should be able to take a rubber spatula and drag it across the bottom of the pot, and it should leave a trail behind.
So that's going to take anywhere between 9 to 12 minutes.
In the meantime, we can do a little bit of vegetable prep.
We're using fennel here, and we're using both the fronds up here and the bulb down here for flavor in two places.
So, I'm going to pick off some of these fronds.
Now I'm going to chop these.
I need about 2 tablespoons of minced fronds.
I'm going to use them later on almost as an herb.
Alright.
So, we have all the fronds that we need, so now I'm going to use the bulb.
I'm going to get rid of these stalks.
And now I want to cut this fennel into 1/2-inch pieces.
So I'm going to get rid of the bottom here, and I'm going to cut this in half, just like that.
And you can see this little bit of a core here.
Now, I want to remove that, so you can just use your knife.
Angle it right in there.
And it should pop out, just like that.
So, now I want to cut this into 1/2-inch pieces.
So I'll stack a few pieces this way, cut across.
Alright.
And then the same thing on my second side of the fennel bulb.
Alright.
So, I'm not going to add this to the pot right away, so let me go ahead and get this into a bowl.
Alright.
Now, before I get to my next vegetable, let me just give this a stir.
It's looking good.
Not quite thick enough yet.
Now, I've got a head of escarole.
About 10 ounces is perfect.
So, I'm going to get rid of the root end here.
And now this just needs to be cut into 1/2-inch pieces, just like the fennel.
And you can see it's quite filthy in there.
So that's why it's a good idea to prep it first and then wash it.
Alright.
So, this is just a rough chop.
And then as I chop it here, I'm going to go ahead and put this in my salad spinner basket.
I'm going to continue to chop the escarole, give it a good wash, and then we can continue.
Oh, it smells amazing in here.
Oh.
And it's looking good, too.
The tomato's really thickened.
And if I take my wooden spoon and scrape right across, you can see there's a distinct trail left behind.
That's a good sign.
This tomato mixture has thickened enough.
Now, originally, acquacotta used water.
It's "cooked water," after all.
But we are using chicken broth.
Just gives it a nicer, richer flavor.
But this is where you could use a vegetable broth if you'd like, or you could be a purist and use water.
You've got a lot of flavor going in here anyway.
So, I'm going to add the fennel at this point.
It's a root vegetable, so it's going to take a little while longer for it to cook until it's nice and tender.
Alright.
We'll stir this in.
And I have one more ingredient to add, a nice cheese rind.
This is a beautiful, new wedge of Pecorino Romano.
It's a sheep's milk cheese.
It's got some really tangy flavor.
And this rind here is just loaded with flavor.
I'm going to use the cheese a little later on, but for now, this rind's going to go right in.
Now, once this comes up to a simmer, I'm going to reduce the heat to medium-low.
We'll continue to simmer it for about five, seven more minutes before we add our next ingredients.
So I've got a little bit of time.
Let's prep some beans.
I've got two cans of cannellini beans here.
These are 15-ounce cans.
And canned beans are perfect.
They've actually been pre-cooked.
They're lightly seasoned.
But the water in here is starchy, so it's going to help with thickening this soup.
We're just going to let this drain.
Okay, that looks good.
I'm going to put the beans over a big measuring cup, and I'm going to set this bean liquid aside.
Alright.
So, it's been a few minutes.
We gave the fennel a head start before we're adding the escarole and the beans.
That's because you want to add the vegetables in stages so that they cook through perfectly.
So now we're going to add in our drained beans.
They can go right in, and the escarole.
It's going to look like a lot, but it will wilt down.
Let me push all that underneath the broth here.
I mean, doesn't that look beautiful?
So, we're going to continue to simmer this for about 10 minutes, which gives me a little bit more time to work on our remaining ingredients.
Alright.
So, now we've got some fresh parsley here.
I've already washed this, kept it in some water to keep it fresh.
And I need 1/4 cup of minced parsley leaves.
So I'll shave off some of the leaves here.
If I get a few tender stems in there, that's fine.
I need 1/4 cup.
Alright.
That looks about like 1/4 cup.
So now some fresh oregano.
It smells so different and tastes so different from dried oregano, so I really recommend getting the fresh oregano for this.
So, I'm just pulling the leaves out, running my hands opposite direction that the leaves are growing in, and we need about 1 tablespoon, so that might do it.
Let me go ahead and chop this.
It looks like a heavy tablespoon.
And I've got a couple of eggs.
Eggs used as a thickener is pretty traditional for acquacotta, but they can scramble if you're not careful.
So we're going to use the bean liquid to our advantage.
Now, I'm just using the yolks here, so I'm going to separate these two eggs.
I'm using cold eggs.
It's a lot easier to separate them.
You can use the shells.
If you've got clean hands, you can use your hands.
Going to add that yolk right into our bean liquid.
Here we go.
Two.
And I'm going to whisk the yolks right into this bean liquid.
So, what's happening here is the bean liquid is basically watering down these egg yolks, so when they hit the hot soup, they're not going to seize up quickly and scramble.
Alright.
We are near the end.
Just have to wait on our soup.
That looks like a big pot of hearty soup.
Oh, it smells so good in here.
And it's been another 10 minutes, so the escarole is nice and tender.
We're just about at the end of cooking, so going to add in the bean liquid that we added the egg yolks to.
Just going to pour it in.
And between the two of those, the egg yolks and the starch in the bean liquid, it just really does a great job of thickening this soup.
So, now in go fennel fronds, the oregano, and the parsley, adding them at the end to retain their flavor.
But does it taste good?
Need to give it a taste myself.
It's really, really good.
I'm going to add a bit more salt.
And if you used water instead of chicken broth, I would definitely check for seasoning.
And I'm going to add some pepper.
Give it a nice stir.
And now I just have one more thing to cook before I can eat it.
Now, the last component of our soup is in the oven.
I toasted some bread.
I used country bread, and I sliced it 1/2-inch thick, then drizzled it with about 1/4 cup of olive oil and sprinkled a little salt and pepper on top.
Stayed under the broiler for about five minutes, but what's most important -- Only broil it until it's a really deep golden brown.
Alright, that looks absolutely amazing.
Now, we use toasted bread here instead of stale bread.
The traditional method uses stale bread.
I don't often have stale bread in my house.
So we're toasting it to give it a little bit more color and some gorgeous texture.
But bread is integral to acquacotta.
So, going to take a slice here, and now I'm going to ladle some of that soup right on top.
It's nice and thick and rich.
Alright.
A little more should do me.
Absolutely gorgeous.
Got my Pecorino Romano here.
Just grate some right over the top.
Lovely.
And a squeeze of lemon just to brighten the soup.
Alright.
It's so rich and meaty, you would actually think that there was meat cooked in it.
A lot of that is due to that cheese rind.
But the textures are beautiful.
It's just tender.
It's not overcooked.
And the escarole adds a really nice bitterness, as well.
Just want to get a little bit of that bread in the bottom there.
Ah, it's like a little dumpling.
It's kind of like the bonus at the bottom of the bowl.
That is absolutely the best cooked water I have ever had.
And if you want to make acquacotta at home, remember these keys.
Use the food processor to make a quick sofrito, cook the vegetables in stages, and use a mixture of bean broth and egg yolks to thicken the soup.
So, from "America's Test Kitchen" at home, the world's best acquacotta.
♪♪ Mmm.
♪♪ -I get more questions about olive oil than pretty much anything else, because there are people out there trying to trick you with really confusing marketing.
So I'm going to tell you what you need to know and what you need to forget about.
So, let's start the bad news first.
There's a lot of mislabeling, especially for American consumers, 'cause they figure we don't know the difference.
First off, "robust."
Oh, it sounds good.
It's going to have a lot of flavor.
Well, a lot of times, we found it has zero flavor or it has bad flavor.
So if it's labeled "robust," not a good sign.
Even worse are oils labeled "light."
It's totally a scam.
They're getting you to think that it has fewer calories.
Has exact same number of calories as regular olive oil or, frankly, for that matter, as vegetable oil.
What it's light on is flavor, and it costs you a lot of money, so skip that.
Enough of the bad news.
Let's have a little good news.
So, these two oils are doing something right.
They're in dark green bottles.
Olive oil hates sunlight.
It hates UV lights from the supermarket.
It does not like any light whatsoever.
And even if it's unopened, it will go rancid in that bottle if it's exposed to light.
Why manufacturers are using clear plastic bottles, I don't know.
Yeah, it looks good.
You get to see what the oil is, but you want to be in a dark bottle, black or green.
These two oils are also doing something good.
Come on.
We're going to get down low.
Now you're going to see what I'm looking for -- harvest date.
Now, the harvest date is probably the most important thing here.
Ignore sell-by, use-by dates.
Harvest date should be from the most recent harvest.
So if it's oil from the Northern Hemisphere, California or Europe, it's in the fall.
If it's from the Southern Hemisphere, South America, it should be in the spring.
So you want to get the most recent harvest.
And so if you're shopping in the fall, you're probably not going to see the current fall.
It's going to be the previous fall.
The point here is that after 12 months, the oil is beginning to "age out."
And in 18 months, it's an old person, and you don't want old oil, 'cause it's going to be rancid oil.
So, another thing you're going to notice on the label, and I'm going to turn this bottle around, is supermarket oils, relatively inexpensive extra virgin olive oils, are typically blended, from oils from multiple locations.
Just makes it cheaper.
If you want a really expensive boutique oil that's from a single vineyard, save it for drizzling and finishing.
But these are everyday oils that I cook with.
Now, if you're thinking, "Oh, don't you cook with that regular olive oil from the can?"
Sorry.
It's terrible.
It really has no flavor whatsoever.
I cook with supermarket extra virgin olive oil.
It's really got a lot more flavor, and it's really worth the extra pennies.
So, there's what you need to know.
Olive oil -- It's not that complicated.
You just need to be a smart shopper.
♪♪ -I love the idea of making bread at home, but I'm a bad planner, so I never seem to get around to it.
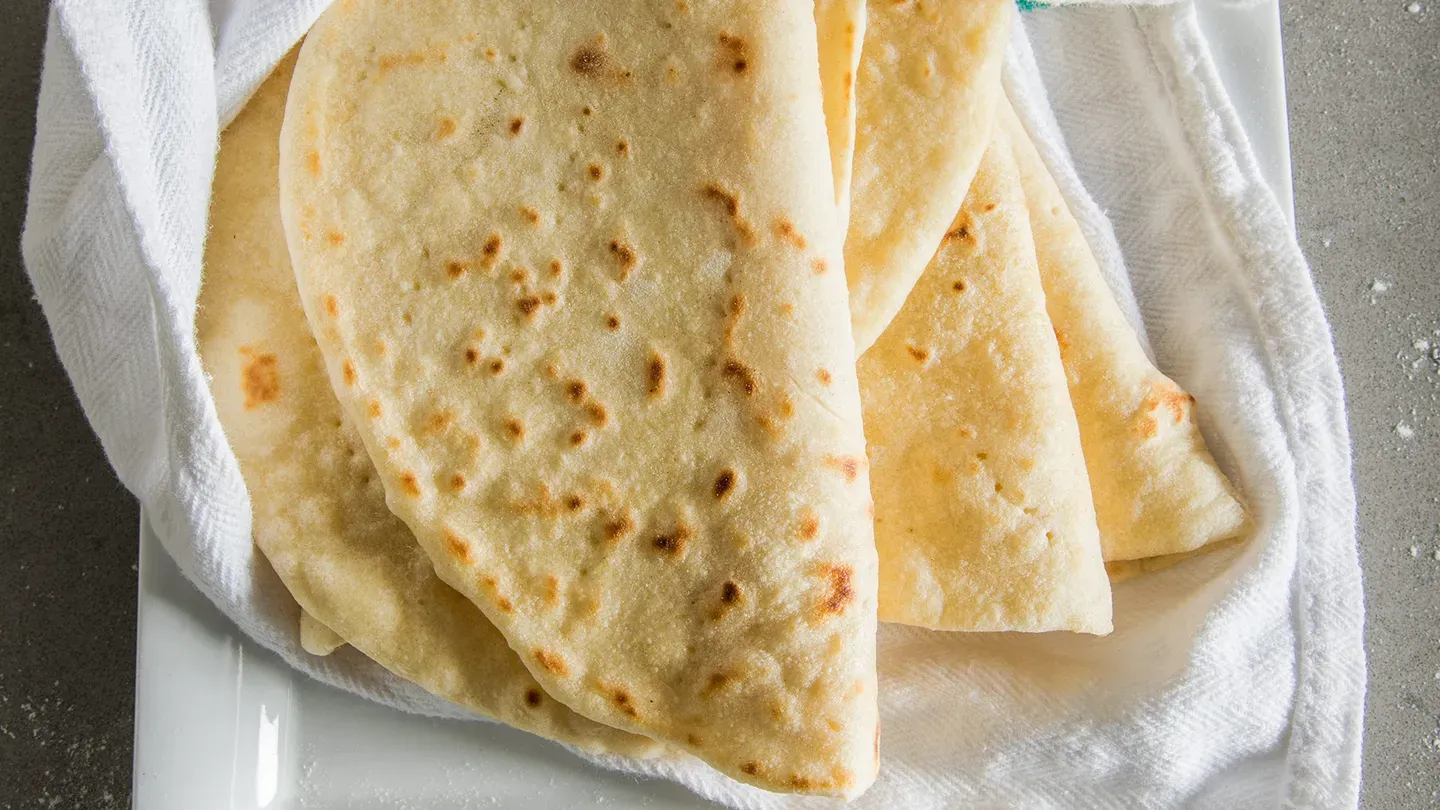
That's why I love these Italian flatbreads.
They're called piadine, and they just have a few simple ingredients.
In under an hour, you can have bread to make a sandwich with.
We're going to start with the flour first.
I have all-purpose flour here.
We need 2 cups.
I'm going to use my scale instead.
It's a lot easier, a lot more precise to use a scale.
I can make sure that I get the same amount every time.
And so, I'm looking for 10 ounces of flour.
Perfect.
Now we want a little bit of salt.
I have some table salt here, 1/2 teaspoon.
Now, most Italian flatbread recipes that we found had three ingredients -- flour, salt, and some sort of fat.
We're going to add another ingredient today, which is one of the keys to this recipe.
We're going to add a little bit of baking powder.
I'm just going to use 3/4 teaspoon.
That's going to aerate that bread just a little bit so it doesn't eat so dense.
Now I'm going to take this and put it into our food processor.
So, we have all of our dry ingredients in the food processor.
We're just going to pulse this really quickly and have it come together.
Okay, now for the fat component.
This dish traditionally uses lard.
We're going to use vegetable oil instead.
It has a little bit more neutral flavor, and it's also pantry-friendly.
So, I'm going to add 3 tablespoons.
Now I'm just going to process it until it's incorporated into the flour.
Okay.
For our last ingredient, we're going to add a little bit of water, just 3/4 cup of water, and this is at room temperature.
And we just want to slowly feed this into the food processor until that dough comes together.
Okay, so, this is all combined, and I'm going to take this out.
I'm going to knead it really quickly on the countertop, about 15 seconds.
Now, if it's feeling really sticky, you can take a little bit of flour.
You don't want to add too much flour at this point.
Okay, so, we're going to make four flatbreads.
So I'm just going to divide this into four pieces right now.
I'm just going to form these into nice, tight balls, and that will help with rolling later on.
What I'm using is the bottom of my hands to kind of create a cupping action.
Just a nice, tight ball like that.
Set those there.
Okay.
So, we have our four balls of dough.
I'm just going to cover this with some plastic wrap, let it sit for half an hour, let that gluten relax, and we'll come back and roll them out.
♪♪ Our dough has rested for 30 minutes.
That gluten has had time to relax, and now it's time to roll them out.
So I'm just going to start with a little bit of flour on the counter.
You don't want a lot here.
You don't need a lot.
Take one of our pieces.
Keep the other ones covered.
I'm just going to pat this out into about a 5-inch circle.
We'll take a rolling pin.
We're looking for a 9-inch round here, and that will fit nicely in the bottom of a 12-inch skillet.
What I like to do is I like to take the rolling pin and roll from the center of the dough out like this.
That looks about good.
Oh, 9 inches perfectly.
So, I'll just set this one aside.
I want to make sure that I have a little bit more flour on the counter up here... ...like so.
Perfect.
Dough number two.
Again, from the center of the dough out.
So, I'll finish rolling out these pieces of dough, and then we'll come back and cook.
It's now time to cook the flatbreads.
And I'm going to cook this in a 12-inch cast-iron skillet.
Cast iron's really nice to cook these flatbreads in because it will cook it really quickly.
The quicker you cook it, the moister that they'll stay.
If you cook it for too long, they're going to become dry and cracker-y.
So, to test the temperature of this, I don't have any oil in here, so I don't have that signifier to make sure it's hot.
I'm just going to take a little bit of water, going to drop it on the surface, and it should sizzle.
[ Water sizzles ] That sounds about ready.
And now it's time to cook our flatbreads.
But before I put the bread in the pan, I just want to take a fork and dock the dough a little bit.
And that will allow us to get rid of any air bubbles there.
We don't want big air bubbles in our bread.
Okay.
Okay, right into our skillet.
So we're going to cook this for one to two minutes on each side.
While this is cooking, you want to keep a fork around in case you get any bubbles that come up, and you can kind of poke those like that.
And I also like to kind of turn this around in the pan a little bit to make sure that we get a nice, even browning.
Okay, I'm going to take a peek.
Oh, that's great.
See, we got some little browning right here.
So, we're going to cook this on the second side.
Same thing -- one to two minutes until we have some nice, spotty browning there.
And again, you want to have your fork around to make sure that you don't have any air bubbles forming.
Okay, I'm going to check our second side to see if it's ready.
Oh, that's great.
We have some nice browning.
Now I'm just going to take this and slide it out to a plate.
And I'm going to fold this in half while it's nice and warm and pliable.
If you wait until it cools down a little bit, there's a chance the bread will crack.
I'm going to cover this and keep this warm, and we're going to cook the second one.
Our second one, I'm just going to dock this really quickly.
Lay it in our pan.
You can see that I have a little wrinkle in there when I put it in the pan.
It's not a big deal.
It won't affect the cooking at all.
So, we're just going to let this cook for one to two minutes.
Okay, we're going to check our first side.
Nice browning.
Flip it over.
One to two minutes.
We'll cook that second side.
Okay, we'll check our second side.
We can see you have nice browning.
Take this out.
He'll join his partner.
Cover that up.
Now we'll cook the rest of our bread.
Our breads are done, and now it's my favorite part -- filling them.
Now, these can be filled a number of ways.
You can go savory with roasted peppers and artichokes.
You can go sweet.
You can fill it with Nutella and bananas.
That's one of my kids' favorites.
But I'm going to make my favorite today.
I'm going to do a little tomato and mozzarella.
So, I have a nice, fresh tomato here.
Just take that core out.
Some nice, thick slices.
I also have some fresh mozzarella.
Okay.
Time to fill.
Take one of our breads.
Our tomato.
Going to add a pinch of salt to our tomatoes.
I'm going to lay some slices of fresh mozzarella over them.
And I'm going to take a couple leaves of basil and tear them into rough pieces.
And last of all, a little bit of extra virgin olive oil.
Okay, now it's time to eat.
The texture of the flatbread is just great.
It's moist, it's supple, and it really complements the filling.
It's not overpowering the tomatoes and the mozzarella.
It's fantastic.
This flatbread is so easy and is so tasty.
I really encourage you to make it at home.
But remember two key points.
Put a little bit of baking powder in the dough, and make sure that you cook it in a cast-iron skillet.
So, from "America's Test Kitchen" at home, a really simple recipe for piadine.


America's Test Kitchen is presented by your local public television station.
Distributed nationally by American Public Television